Getting the most from foobar2000

foobar2000 is my favorite music player. It is very lightweight program which even runs on Linux under Wine. It is components based so you can install additional features into it like users can install plugins to improve Winamp. I would like to list some of the best components you should install:

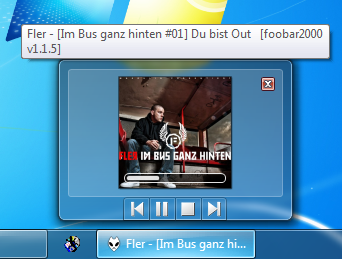
  1. Windows 7 Shell Integration – This component enhances the preview window in Windows 7 with play controls, progress bar and album art preview. Very similar to the feature in Windows Media Player on Window 7.
  1. Discogs Tagger – Automatic ID3 tagging using discogs.com.
  2. Audioscrobbler – Last.fm audioscrobbler. Sends information about currently played songs to last.fm.

Customize GNOME panel in Jolicloud

When you install JoliOS you are not able to customize the top panel. This is quite uncomfortable. I would like to display Tomboy applet and hide Notification area, because icons on this applet are automatically resized to fit the panel size which makes some of them look really ugly (e.g. the Wuala icon).

To make the panel customizable like in other GNOME based distributions you have to go to the ~/.gconf/apps/panel folder and rename applets to for example applets_bak. After that logoff and login again. You should se a blank top panel ready to be customized 🙂

Increasing size of vmdk virtual machine disk

I don’t have any of the VMware products installed on my PC, but I have some VMDK virtual machine disks which I run inside VirtualBox.I had trouble installing some update on one of my virtual machines because I did not have enough space. I needed to make it larger, but I was not able to find some easy solution without having to install VMware Server or similar robust not free software.
I used to copy virtual disks using CloneVDI tool and I realized that it is possible to resize the virtual machine disk during cloning. This tool is very simple to use and does not require to be installed.
You can download it from VirtualBox forums or you can download it from my site mirror.

Optimize TortoiseSVN

You may already find out that there is some mighty process in your task manager called TSVNCache.exe. This process is running in background to allow you see correct icon overlays of your working copy folders and files. It checks for file changes and caches their status in real time. It is necessary process because otherwise you won’t be able to see status recursively. Instead of getting status when you access the folders, it loads the status from this cache.
The problem here is that the process scans all file changes, so it may produce a lot of disk usage when you make a lot of file operations even outside of your working copies.
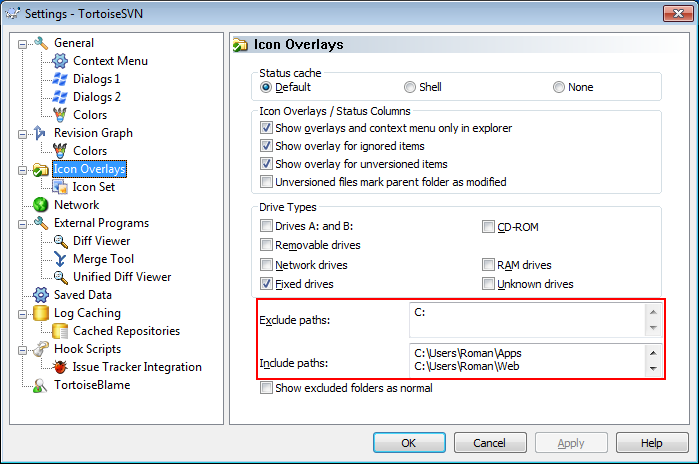
However in TortoiseSVN settings you can specify which folders you want to scan and which not. In the screen below I forced TortoiseSVN to scan only the two folders specified in the Include paths. Other folders won’t be scanned because disk C: is specified in the Exclude paths.

Fixing problem with ID3 tags on Windows 7 and Windows Media Player

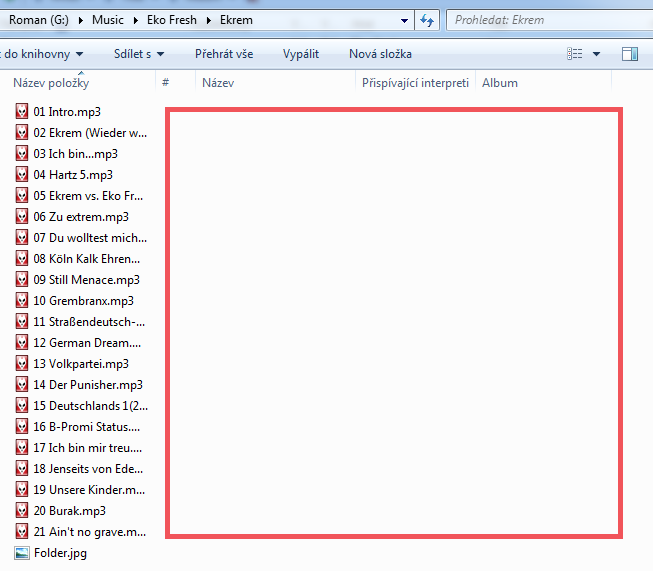
Some of my music files in Windows Media Player did not show information about album, artist etc. I had them all in one section called Unknown album. I also found out that there are no meta tags displayed in the album’s folder.

To fix this I installed ID3-TagIT which was proposed on some forum.
After you install it. Open it and select a folder with corrupt files. then select all of the files which will appear. In the menu choose Extended Functions > Transfer/Convert TAGs or simply pres F7 key. In the dialog click on Convert TAG Ver. 2.4 to Ver. 2.3 and press OK. Finally save the changes. Missing information should appear in the music folder and tags should be OK also in the Windows Media Player.

Running UltraVNC repeater under Linux server

I am playing with remote support tools. There are a lot of good payed tools like TeamViewer, GoToMeeting and others but they are expensive. I found that UltraVNC has some tools like Single Click which can make it easy to provide remote support to your customers. Finally I ended by ChunkVNC which is basically UltraVNC but looking much more better.
There is a lot of tutorials on the Internet but they describe direct connection support. Which means at least one of the PC’s has to be accessible from the outside world. But I wanted to setup some server which I would connect to instead of connecting directly to customer’s PC. This server is called Repeater. UltraVNC has a repeater targeting Windows platform. But I have a Linux server and I wanted it to be running there. Fortunately a Linux port of the UltraVNC Repeater is also available. I have created a mirror of the latest version in case the original page won’t work.
The installation itself is not a big problem even though you have to compile the sources.

  1. Connect to the server using SSH
  2. Go to temp: cd /tmp/
  3. Download the sources: wget http://downloads.stefko.cz/uvncrepeater.tar.gz
  4. Extract them: tar zxvf  uvncrepeater.tar.gz
  5. Go to the sources directory: cd uvncrepeater/
  6. Compile the sources: make
  7. Copy repeater to sbin: cp repeater /usr/sbin/repeater
  8. Run it: /usr/sbin/repeater

If you want to make it running as a service you can use the following piece of code:

#! /bin/sh
# vnc: start/stop/restart the VNC repeater server
# chkconfig: 3 20 80
# description: VNC repeater server

vnc_start() {
if [ ! -f /etc/uvncrepeater.ini ]; then
echo "File /etc/uvncrepeater.ini does not exist. Aborting."
exit
fi
/usr/sbin/repeater 2>>/var/log/vnc.log &
pgrep repeater >/var/run/vnc.pid
}

vnc_stop() {
killall repeater
rm /var/run/vnc.pid
}

vnc_restart() {
if [ -r /var/run/vnc.pid ]; then
kill `cat /var/run/vnc.pid`
else
echo "Killing repeater in the absence of /var/run/vnc.pid"
killall repeater
fi
sleep 1
vnc_start
}

case "$1" in
'start')
vnc_start
;;
'stop')
vnc_stop
;;
'restart')
vnc_restart
;;
*)
echo "usage $0 start|stop|restart"
esac

Take the code and save it into /etc/init.d/vnc file on the server. Then run the following commands to install it as a service:

  1. chmod +x /etc/init.d/vnc
  2. chkconfig –add vnc
  3. chkconfig –level 3 vnc on

iTunes music over internet

I have been playing with my Maxtor Shared Storage II drive recently. It is an external disk which can be shared over Ethernet without having some PC running. This drive can also be used as a media server allowing music players play music directly from it. It’s good because you can have one place for your music for whole family.
Maxtor is running a server which uses DAAP (Digital Audio Access Protocol). This protocol was first introduced by Apple.
What I wanted to do was access my home music also at work. The problem is that new versions of iTunes does not support DAAP over internet, just inside local networks.  So I was looking for some alternative players and found those two, which allowed me to do that:

  1. Windows: Songbird with plugin
  2. Linux: Banshee

Connection problem when stunnel is run on boot time in Ubuntu

If you are using stunnel in client mode you may experience connection problems when connecting to your stunnel services.
To avoid these problems make the following changes in your stunnel.conf file:

  1. Comment out the following line: chroot = /var/lib/stunnel4/
  2. Update pid file location with this: pid = /var/lib/stunnel4/stunnel4.pid
  3. Add delay = yes into the service configuration

In this case DNS lookup will be done when the service is needed for the first time.

Quick steps to configure stunnel4 for client mode

It is really simple to add POP3 SSL support to your existing e-mail client which does not support it, or whatever SSL support you want using stunnel. I just cannot remember all the steps to set up clean system. So I have created this small guide which will help me in future and may be will help somebody else too.

  1. Install stunnel if you don’t have it installed already: sudo apt-get install stunnel
  2. Allow stunnel to autostart by editing stunnel defaults file: sudo gedit /etc/default/stunnel4
  3. Finally perform the following task on the /etc/stunnel/stunnel.conf file:
    1. Comment the following line, so that we want have to generate certificate, because we don’t need it in client mode: ;cert = /etc/ssl/certs/stunnel.pem
    2. Change sslVersion to all if you need support for all SSL types
    3. Uncomment the following line: client = yes
    4. Add definition for client vs. server ports. In my case I was redirecting to FastMail:
      [pop3]
      accept = 1109
      connect = mail.messagingengine.com:995